|
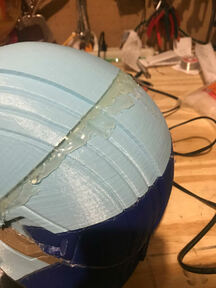
As soon as I had the helmet glued together, i discovered that there was only one seam that had a substantial gap. I filled this and some smaller gaps with hot glue.
|
|
|
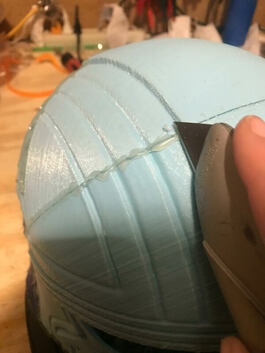
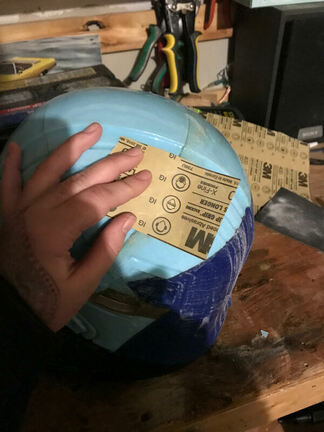
I spent a little time cutting out excess hot glue to make the helmet slightly smoother, and making the helmet's surface a little more flush. I then sanded everything down to make it smoother. Sanding the PLA plastic can sometimes be a challenge, since heating it up (with the friction of the sandpaper) can cause it to chip and flake off. So I only used the power sanders on the hot glue, and in small intervals on the plastic.
|
|
|
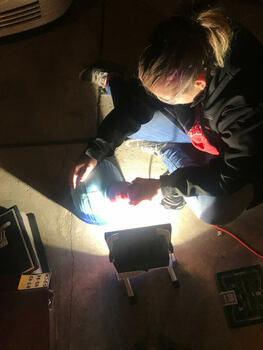
As soon as the helmet was free of any sharp edges left behind by the supports, and it was relatively smooth all around, it was time to seal it. I first made a test area on the inside of the helmet. This particular sealant came in two bottles, and when mixed together, they chemically change in order to achieve the right consistency; however, this also meant that the mixture gave off heat. By testing on the inside of the helmet, it ensured that the sealant wouldn't melt the plastic and ruin the helmet.
|
After the first layer of the sealant was on, I had a lot of sanding to do. This stuff sands down very well, and as long as you have patience, can make the helmet almost seamless.
|
|
|
After the first layer of sealant was sanded to as much perfection as I was willing to achieve, I used an air gun to get rid of all the leftover sanding residue before bringing the helmet inside to pour the second layer of sealant.
|
|
|
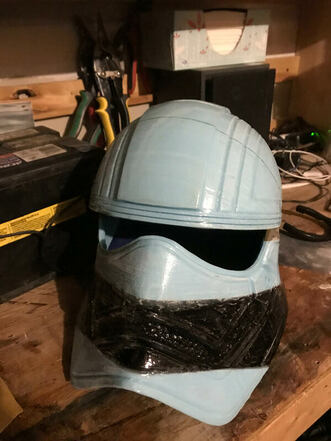
As soon as the second layer of sealant was dried I used very fine sandpaper to get rid of the small air bubbles leftover from the drying sealant. Now it's time to finally paint!
|
|
|
I first coated the helmet in a couple layers of Plasti-Dip, since it is able to be removed. One day I would like to sand the helmet even more, so being able to remove the outer layer of paint will be helpful in the future. After the Plasti-Dip had dried, I put two layers of the silver spray paint I used for the armor.
|
